

Basics of Plastering: All That You Ought to Know
Plastering is a critical part of the construction and renovation process, forming the smooth, protective layer on walls and ceilings that offers both aesthetic appeal and practical function. For anyone considering taking on a plastering project, whether in a professional or DIY capacity, understanding the basics is key. This guide delves into everything you need to know about plastering, including types of plaster, essential tools, techniques, and tips to achieve flawless results.
What Is Plastering?
Plastering is the act of applying a fine plaster layer on the walls, ceilings, or other surfaces to leave an aesthetically smooth and even wall finish. It becomes more of a pleasing and useful layer because of which the aesthetics of a room enhance along with providing protection to moisture and temperature variations and wear. In addition, plastering produces soundproofing effects as well and can contribute to a certain level of fire resistance.
Basically, plastering intends to produce a surface that is smooth, flat, and rugged. In most modern construction techniques, plastering is used along with other materials such as drywall or plasterboard, while it has been in use since ancient times when the first people started building civilizations.
The Types of Plasters
Plaster is not one material to use in any application. Different types of plasters are applied to various works with their benefits. To understand which plaster would suit the requirements, one must first know about the differences among them.
Lime Plaster
Before the invention of Portland cement, lime plaster was historically used in building structures. Slaked lime and sand are its primary ingredients, making it breathable and flexible, ideal for older buildings with moisture control needs. Lime plaster is used in traditional homes or for restoration projects when you need to maintain the integrity of older architecture.
Benefits of Lime Plaster
• Breathable, allows moisture to escape
• Flexible, ideal for older, movement-prone buildings
• Sustainable and eco-friendly
Cement Plaster
Cement plaster is the most common type of plaster in modern construction. It is made from cement, sand, and water, and is usually applied to masonry walls or concrete surfaces. Cement plaster is durable and resistant to wear and tear, making it ideal for areas with high traffic or exposure to the elements.
Advantages of Cement Plaster:
• High strength and durability
• Weather-resistant
• Easily adaptable for all sorts of surfaces
Gypsum Plaster
Gypsum plaster, also known as dry plaster, is one plaster material made from gypsum, a naturally occurring mineral. Generally, it is applied to interior areas and is recommended for producing smoother, more refined finishes. Gypsum plaster sets fast a boon in terms of projects calling for faster completion.
Benefits of Gypsum Plaster:
• Super smooth, polished finish
• Sets fast for fast work
• Lightweight
Clay Plaster
Clay plaster is an eco-friendly, natural product based on clay, sand, and natural fibers. It is getting popular for use in eco-friendly construction because of its breathability and energy efficiency. Clay plaster also helps to regulate humidity, which can be used in low-carbon-footprint homes.
Advantages of Clay Plaster:
• Eco-friendly and sustainable
• Breathable and moisture-regulating
• Aesthetic appeal with a rustic, natural finish
Bonding Plaster
Bonding plaster is usually applied as a base for finishing layers. It bonds well to surfaces and provides a smooth base for topcoats, such as gypsum plaster or other finishing plasters.
Advantages of Bonding Plaster:
• It has excellent bonding properties
• It is used as an undercoat for finishing layers
• It helps in providing a stable base for subsequent layers
Tools and Equipment for Plastering
In order to accurately spread, smoothen, and apply consistency with plaster, a particular toolset is used. Here’s the list of primary tools involved in plastering.
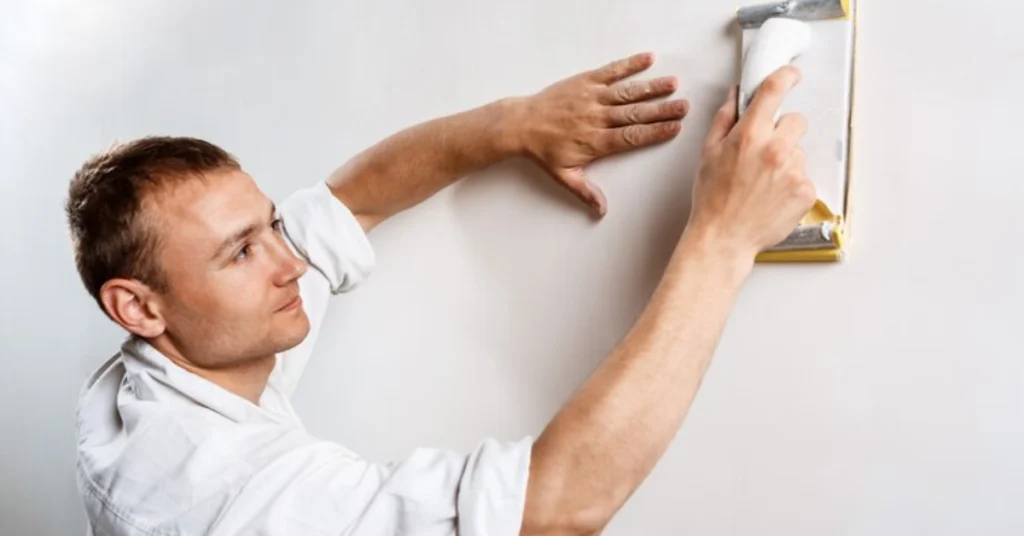
Trowel
A trowel used for plastering is one of the most critical ones in a plastering operation. It helps apply and spread smooth plaster to a surface. Size and shape might vary in this tool, but the common tool used in such an application would be flat with a rectangular blade.
Tip: Hold the trowel at a slight angle to create an even layer without overworking the plaster.
Hawk
A hawk is the flat board holding a handle at one end where you can handle and maneuver plaster mixture to plaster surfaces. In addition, you get a fixed surface on which to hold plaster as you continue with the plastering, free from drips or spills.
Tip: Keep the hawk at a comfortable height and ensure you’re scooping plaster efficiently to prevent unnecessary strain.
Float for Plastering
The plastering float is used to smooth and level the surface after applying the plaster. This will help in completing the surface with a perfectly smooth and even texture. A float is usually made of rubber, plastic, or wood.
Tip: For a polished finish, use a float in a circular motion to create a smooth, seamless texture.
Mixing Paddle
A mixing paddle is usually used in combining the ingredients in the plaster. This equipment is usually attached to a power drill to make mixing faster and more uniform in consistency.
Tip: Always mix plaster in small batches to avoid it setting before you can use it. A consistent, lump-free mixture is crucial for a smooth application.
Plastering Brushes and Sponges
Plastering brushes are used for applying bonding agents or preparing the surface before plastering. Sponges are essential for finishing and cleaning up excess plaster during the process.
Tip: Use a damp sponge to lightly touch the surface to remove any excess plaster or to smooth out minor imperfections.
Plastering Brushes
These are used to apply a bonding solution to the surface, ensuring that the plaster adheres properly. It’s very crucial to brush the walls thoroughly before applying plaster, especially when working on porous or previously painted surfaces.
Tip: Brush the surface in long, even strokes to ensure complete coverage and proper adhesion of the plaster.
Measuring Tape and Spirit Level
To ensure that your plaster is applied evenly and accurately, it’s essential to measure and level the surfaces. A measuring tape and spirit level can help guide your work and achieve uniform results.
Tip: Always check the level of your surface as you work, especially when applying multiple layers of plaster.
Edge Beads
Edge beads are used to protect the corners and edges of plastered walls. They offer structural support and give a clean, sharp finish to the edges of plastered surfaces.
Tip: Install edge beads carefully and ensure they are level with the wall surface to achieve a neat and clean edge once the plastering is complete.
Plastering Techniques: Step-by-Step
Achieving the perfect finish requires more than just applying plaster. Mastering the technique is crucial to getting smooth, flawless results. Here’s a step-by-step breakdown of the plastering process.
Prepare the Surface
Then, ensure that the surface is clean, dust-free, and properly primed before applying the plaster. If you’re plastering over a new surface like brick or blockwork, you need to apply a bonding agent to ensure that the plaster sticks well.
Key Steps
• Scrape off all the old paints, wallpapers, and debris from the surface.
• Clean the surface very well to remove dust and dirt particles.
• Apply a bonding agent, if necessary.
Mix the Plaster
Depending on what type of plaster you have, you’ll either buy one that’s already mixed in a store or be mixing it in your own place. Mixing from powder requires pretty much the instructions by the manufacturer. A mixing paddle is the most essential tool to use in combining the plaster and water without any lumps.
Tips
• Mix the plaster to a thick but smooth consistency.
• Work in small batches so that the plaster doesn’t set on you.
Apply the Base Coat
Base coat is what provides a base on which the final finish will be worked upon. It’s usually applied in a slightly thicker layer and, therefore, needs to be worked on quite rapidly because, as you probably know by now, plaster sets pretty fast.
Step:
• Load up the trowel from the hawk with the amount of plaster.
• Apply the plaster to the surface, using a sweeping motion of the trowel, and push it into the surface.
• Scrape the plaster even and smooth until all air pockets and holes have been eliminated.
• Smoothen the plaster over to a flat and even finish.
Second Coat or Finishing Coat
The second and much thinner finishing coat is applied after the first coat has reached a touch-dry stage. This coat should be very much smoother and lighter to give the final finish.
Key Steps:
• Apply the finishing coat in a thin, even layer.
• Smoothen the plaster with a trowel.
• Flawless and even surface without any imperfections.
Final Touches
Once the plaster is applied fully, you need to make sure the surface is perfectly smooth. That’s where a plastering float comes in. You can use the float to smooth out the surface further and give it a polished, uniform look.
Tips:
• Use a damp sponge to lightly go over the surface to remove imperfections for a smooth finish.
• Work in small sections so that the plaster does not dry out before you can smooth it.
Allow to Dry
Once you’re satisfied with the finish, allow the plaster to dry. Drying time can vary depending on the thickness of the plaster and the type used, but typically, plaster takes around 24 to 48 hours to dry fully.
Common Mistakes to Avoid
While plastering is a relatively straightforward process, there are a few common mistakes that can ruin your work. Here are some to keep in mind:
Not Preparing the Surface
It is very important to clean and prepare the surface before applying plaster. A dirty or unprimed surface will cause the plaster to peel or crack.
Mixing Plaster Incorrectly
Always follow the manufacturer’s guidelines when mixing plaster. Too much water or too little can affect the consistency, making it difficult to apply or leading to weak results.
Applying Plaster Too Thick
Applying plaster in layers may cause cracking as it dries. Apply thin, even coats and wait for each coat to dry properly before applying the next.
Not Working Fast Enough
Plaster dries fast, so work in small sections and apply the material when it is still workable. Do not let it sit there too long to smooth and level the surface.
Conclusion
Plastering may seem like a daunting task, but with the right tools, techniques, and a little patience, anyone can achieve professional-quality results. Whether you are restoring an old home, renovating a room, or building a new space, plastering is a skill that can add both beauty and functionality to your home. You can now confidently face any plastering project by understanding the different types of plaster, the necessary tools, and the proper application techniques.
With a comprehensive understanding of the basics of plastering, you can now start your next project with more expertise.
Are You looking For Professional Plastering Services in Dubai? Contact us or call us at: +971 50 170 4507 to get a quote.
